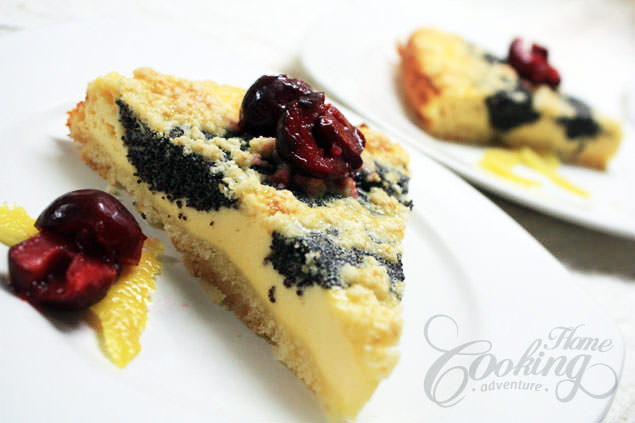
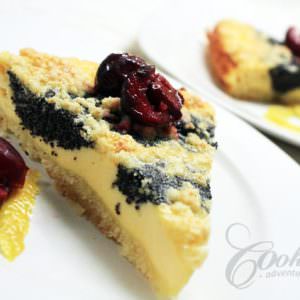
This Poppy Seed Cheesecake is one of the best poppy seed cakes we’ve ever eaten. If you like poppy seeds you will love this cheesecake. It has the perfect combination of creamy cheese filling, aromatic poppy seed layers, and a crunchy, buttery crust.
My sister gave me this recipe and after I tried it out it became one of my favorites. Everything is made from scratch, even the crust. You can always change to biscuit crust if this works better for you.
This Cheese and Poppy Seed Cake has an amazing flavor and texture combination and is suitable for any occasion.
How to make poppy seed cheesecake
Begin with preheating your oven to 175°C (350°F).
Prepare the crust
For the crust, start by adding all the ingredients, butter, sugar, flour, baking powder, and cinnamon in a food processor and process until crumbs are formed. Press 2/3 of these crumbs into the bottom of a 10-inch (26 cm) springform pan with a removable base, ensuring they stick together without losing their crumbly texture.
Prepare the cheese filling
For the cheese filling, beat together the cheese, lemon juice and zest, vanilla extract, sugar, cornstarch, and vanilla pudding powder in a food processor until well blended. Gradually add the eggs one at a time, making sure each egg is fully absorbed before adding the next.
Prepare the poppy seed filling
To prepare the poppy seed filling, bring the milk and sugar to a boil. Pour this hot mixture over the ground poppy seeds and let them absorb all the milk. Once the mixture has cooled, add the egg and breadcrumbs, mixing well.
How to assemble the poppy seed cheesecake
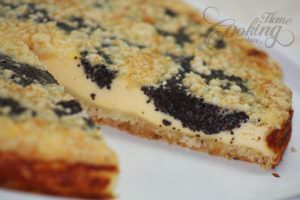
Assemble the cake by pouring the cheese filling over the prepared crust, forming one circle in the middle and two rings—one at the edge and one in the middle. Fill the spaces between the cheese rings with the poppy seed mixture. Sprinkle the remaining crust crumbs on top.
Bake the cake in the preheated oven for 40-45 minutes. Once done, run a sharp knife around the inside edge of the pan to loosen the cake. Let it cool at room temperature.
Serve this delightful cake immediately or refrigerate it overnight for a firmer texture.
Hope you will try it out and enjoy it as much as we did. If you do make sure to share the photos with me on Instagram. Would love to see how it turns out for you.
For more cheesecake treats check our full collection of Cheesecake Recipes.
YOU MAY ALSO LIKE:
Classic Cheesecake
Brownie Raspberry Cheesecake
Basque Burnt Cheesecake
Strawberry Poppy Seed Layer Cake
Poppy Seed Cheesecake
Ingredients
Crust
- 2/3 cup (150g) butter
- 2 tbsp (30g) sugar
- 1/4 tsp cinnamon (optional)
- 1/4 tsp (1g) baking powder
- 1 ¼ cup (160g) flour
Cheese Filling
- 10 oz (300g) fresh cheese (cream cheese or ricotta cheese)
- 2 eggs
- 1 tbsp (15ml) fresh lemon juice
- Finely grated zest of 1 lemon
- 4 tbsp (60g) sugar
- 1 tbsp (8g) cornstarch
- 1 tbsp vanilla pudding powder
- 1 tsp (5g) vanilla extract
Poppy seed Mixture
- 1/2 cup (120ml) milk
- 2 tbsp sugar
- 3 oz (80g) ground poppy seeds
- 1 egg
- 1 tbsp breadcrumbs
Instructions
- Preheat oven to 175C (350F).
Prepare the crust.
- For the crust mix all ingredients in a food processor until crumbs are formed.
- Press 2/3 of the crumbs into bottom of a 10-inch (26) spring form pan (with a removable base) so that they stick together but not so much that it'll lose its crumby texture.
Prepare the cheese filling.
- For the cheese filling beat cheese, lemon juice and zest, vanilla extract, sugar, cornstarch and pudding powder in a food processor until well blended. Start adding the eggs one at a time until each egg is absorbed.
Prepare the poppy seed filling.
- Bring the milk with the sugar to a boil. Pour it over the poppy seeds.
- Let the poppy seeds absorb all the milk. Add the egg and the breadcrumbs.
Assemble the cake.
- Pour the cheese filling over the prepared crust forming 1 circle in the middle and 2 rings, one at the edge and one in the middle. Pour poppy seed mixture between the cheese rings. Sprinkle the rest of the crust crumbs on top.
- Bake for 40-45 minutes. Run a sharp knife completely around the inside edge of the pan. Let it cool at room temperature. Serve it or refrigerate overnight.
Nutrition
Did you make this recipe?
Please let me know how it turned out for you! Leave a comment below and tag @homecookingadventure on Instagram and hashtag it #homecookingadventure.
These look amazing..and you are really talanted with pictures..great blog
I really want to try this. Such a unique recipe. Curious about the poppy seeds being described as “grounded”. Does this mean you literally take the poppy seed and grind it up in a food processor into a more powdery substance? The only poppy seeds I’ve ever come across are already very tiny so I wasn’t sure if I understood correctly.
If you love poppy seeds and cheesecake this is the perfect combination. I love this recipe. When I referred to poppy seeds as grounded means that is important not to use whole poppy seeds like the ones used for topping bagels. These whole poppy seeds need to be ground to be able to use them in a dessert recipe. A food processor can not ground poppy seeds (I know as I tried once:) ). The best thing is to buy poppy seeds that are already ground otherwise a solution may be an electric blade grinder like the one for coffee. See if this link helps you understand better. https://en.wikipedia.org/wiki/Poppy_seed For any other questions don't hesitate to ask.
I didn’t know, if I had to melt butter for crust mix – my food processor didn’t worked out ok without butter being melted. Also, forming 1 circle in the middle and 2 rings, one at the edge and one in the middle, wasn’t successful. Video or more pictures would be really helpful, please, thank you!